

Put Your Synology App Links on One Homepage
Set up Homepage with Synology Container Manager, add a bookmark, and check saved settings. Includes local access, backup, update and recovery steps.
Eugene Gavrilov
8 min read- NAS & storage
If you keep looking up the address of each NAS app, put the links you use on one page. Homepage can hold those bookmarks. Start with one link, check that it opens, then restart the dashboard and check that the link stays.
This guide uses Synology Container Manager's Project interface, with no terminal or Portainer. The result is a page for your trusted home network. It does not install the services you link to or configure remote access.
By the end, you should be able to open the dashboard, follow a bookmark, and find its saved configuration in File Station. These are checks for you to perform; this is a source-grounded walkthrough, not a report of a physical NAS test.
Choose the addresses you want to keep
Open an existing NAS service in your browser and copy its working local address. Keep its http:// or https:// prefix and any port number after the colon. You can use another working service as the second destination later. For the first edit below, a link to official Homepage documentation gives you a destination without assuming you already installed another app.
A URL is an address such as http://192.168.1.50:3550: http:// is the connection scheme, 192.168.1.50 identifies a device, and 3550 identifies the service on that device. This address is illustrative. You will replace it with your NAS's private LAN IP. A domain name is another way to identify a host; this setup uses an IP and needs no domain or DNS change.
Give the dashboard a home
Before starting, check that your exact NAS model supports Container Manager and that the installed package has Project. Install Container Manager and Text Editor from Package Center where offered. Text Editor is the editing tool used here. You also need permission to manage projects and write to the folder you choose. If Project is unavailable, this route does not apply to that installation.
The image is the packaged application. The container runs that image. A Project keeps the Compose instructions that describe how to run it. Keep Homepage’s configuration in a NAS folder so you can replace the container without recreating your bookmarks.
In File Station, open your docker shared folder, create homepage, and create config inside it. If you use another writable shared folder, keep the same relationship: the project folder contains config.
| Item | What it holds |
|---|---|
docker/homepage | Project working directory and Compose configuration |
docker/homepage/config | Homepage settings and bookmark files |
/app/config | The container's view of that same config folder |
These paths are the example structure used in this guide. The bind mount connects the NAS folder to the container path.
Create the Project
- Open Container Manager → Project → Create.
- Set Project Name to
homepage. - Set Path to the
homepagefolder you created. - Under Source, choose to create
docker-compose.ymlin the editor.
Find your NAS's private LAN IPv4 address before pasting the following Compose configuration. Use the NAS address, not your computer's or router's. Replace both instances of 192.168.1.50 below. A stable NAS address prevents this saved mapping from pointing at an address the NAS no longer owns.
services:
  homepage:
    image: ghcr.io/gethomepage/homepage:v2.7.0
    container_name: homepage
    environment:
      HOMEPAGE_ALLOWED_HOSTS: "192.168.1.50:3550"
    ports:
      - "192.168.1.50:3550:3000"
    volumes:
      - ./config:/app/config
    restart: unless-stopped
The image tag v2.7.0 was available in the project's official package registry on November 4, 2026. It is pinned here so a later deployment does not silently follow the moving latest tag.
The port mapping means “listen on this NAS IP at port 3550, and send requests to Homepage at port 3000 inside the container.” The ./config folder is relative to your project's Compose directory. unless-stopped supplies the restart policy.
HOMEPAGE_ALLOWED_HOSTS lists the addresses Homepage accepts. Use IP:port, without http://. If you later add another access address, separate entries with commas and no spaces. Do not replace the list with * to bypass an error.
This small setup does not mount the Docker socket: bookmarks do not need access to Docker integrations. It follows the official image's default root container mode. PUID and PGID are optional, but a non-root setup needs your actual IDs and matching folder permissions; the numbers in somebody else's guide are not universal.
Open Homepage on your home network
Leave the optional Web Station portal disabled for this direct-port setup. Confirm the wizard summary, click Done, and choose to start the Project. Check its output for errors while the image downloads and the container starts.
From a device on the same home network, open http://192.168.1.50:3550, substituting your NAS IP again. Keep http:// for this local exercise. Do not add router forwarding, a public tunnel or a public domain route. Binding to a private IP narrows where the container listens; it does not neutralize forwarding you already configured.
The allowed-host list is not a password. Homepage v2 and later supports optional authentication by password or OIDC, but this minimal configuration does not enable either option. Keep it on a trusted LAN; treat remote access as a separate security task.
If Homepage reports a host-validation error, compare the exact host in its logs with HOMEPAGE_ALLOWED_HOSTS, including :3550. Logs are also stored under config/logs/homepage.log.
Add one link and follow it
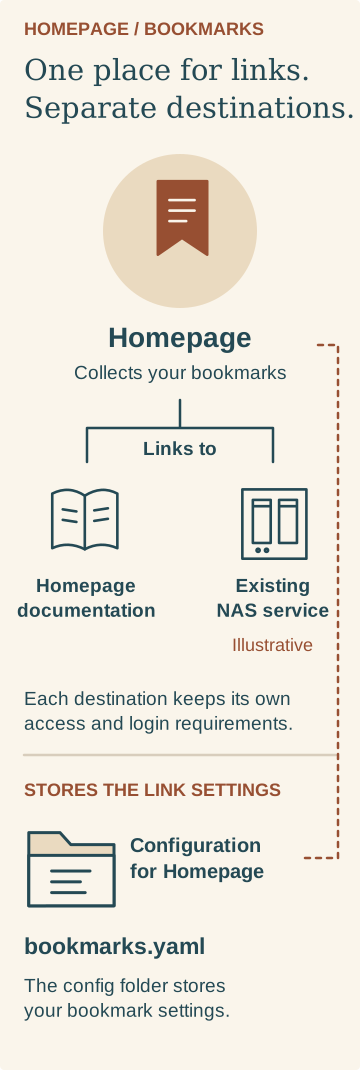
Homepage links to its documentation and an illustrative existing NAS service. A separate configuration folder stores Homepage bookmark settings.
In File Station, open homepage/config and find bookmarks.yaml. Right-click it and select Open with Text Editor; alternatively use Text Editor → File → Open. Save a copy of the existing file before changing it. If the file is missing, inspect the Project state and configured mount rather than creating files in a different folder.
Replace the content with this small example, preserving its spaces:
- NAS:
    - Homepage docs:
        - abbr: HP
          href: https://gethomepage.dev/
NAS names the group. Homepage docs names the bookmark. HP is its two-letter abbreviation, and href holds its destination. YAML uses indentation to show which values belong together; do not replace the spaces with tabs.
Save the file, reload the dashboard, and follow the bookmark. Once that works, duplicate the bookmark structure to add a service address you already checked. Homepage collects the links; each destination keeps its own access and login requirements.
Keep the useful page simple
Select the homepage Project and choose Restart. Reopen Homepage and check that the bookmark remains. Look in File Station to confirm config/bookmarks.yaml is still there. Those checks establish whether your own setup is storing the file where intended.
Recover from a setup error
| What you see | What to check |
|---|---|
| Project or package unavailable | Check exact model support before trying another package. |
| Compose/YAML error | Check indentation, quotes and the substituted NAS address. |
| Port already in use | Choose another NAS-side port; change 3550 in the mapping, allowed host and browser URL. Keep the final 3000. |
| Cannot bind the address | Confirm the IP belongs to the NAS and has not changed. |
| Missing bookmark or configuration error | Check the saved filename, indentation and config mount; restore your saved file if needed. |
| Permission error | Check the actual folder access and mount path; do not copy guessed user IDs or grant everyone write access. |
These checks follow the configuration and storage rules above. If they do not resolve it, save the exact Project error and consult the linked official documentation.
Back up before updating or removing
Stop the Project, then copy the entire homepage working directory—including Compose and config—to an independent backup location. Check that the copy contains bookmarks.yaml and the image reference. This is the proposed backup procedure, not a claim that a restore has been tested.
For an intentional update, read the Homepage release notes, make that backup, then change the image tag to your chosen available release under Project Details → YAML Configurations. Deploy the changed configuration using the Project controls, inspect the output, and repeat the local-opening and bookmark checks. A plain Restart does not install a new image or apply a changed Compose definition. Version tags are deliberate references, not immutable digests.
For recovery, stop the Project, restore the matching pre-update configuration and redeploy the previous image reference. Keep the backup until the replacement works; the availability of an old tag alone does not guarantee rollback.
To pause the dashboard, choose Stop. Before uninstalling, retain that independent backup and read the deletion confirmation carefully: Synology documents Project Delete as removing containers and project data. Do not use Clean or Delete as a routine refresh action. Remove the dedicated homepage folder only when you no longer need it.
Your next step is another working bookmark: add its address, open it from Homepage, and check it remains after restart. Add widgets and monitoring later if you need them. The bookmark dashboard does not require that extra integration access.
Primary documentation checked November 4, 2026: Homepage Docker installation, allowed hosts and security, bookmarks, and Synology Project help.