

How to set OpenDNS on your Synology NAS
Set OpenDNS on your Synology NAS in DSM, check the saved resolver addresses and restore your previous DNS settings if needed.
Eugene Gavrilov
5 min read- NAS & storage
To use OpenDNS for your NAS's normal DNS lookups, enter 208.67.222.222 and 208.67.220.220 in DSM's network settings. The procedure below follows Synology's DSM 7 documentation, corroborated by its DSM 7.2 guide. It changes the NAS's resolver settings; it does not configure every device at home.
Know which address you are changing
Your NAS stores files. Your router connects your home network to the internet. A DNS resolver looks up a name, such as www.synology.com, to find its network address. The two OpenDNS addresses below identify resolvers; they are not a new address for your NAS.
The relevant paths are:
- Administration: your computer on home Wi-Fi → local network → DSM on the NAS.
- Name lookup: NAS using its system DNS settings → router/internet connection → OpenDNS.
These are different paths. Opening DSM in a computer browser does not make the browser use the NAS's DNS.
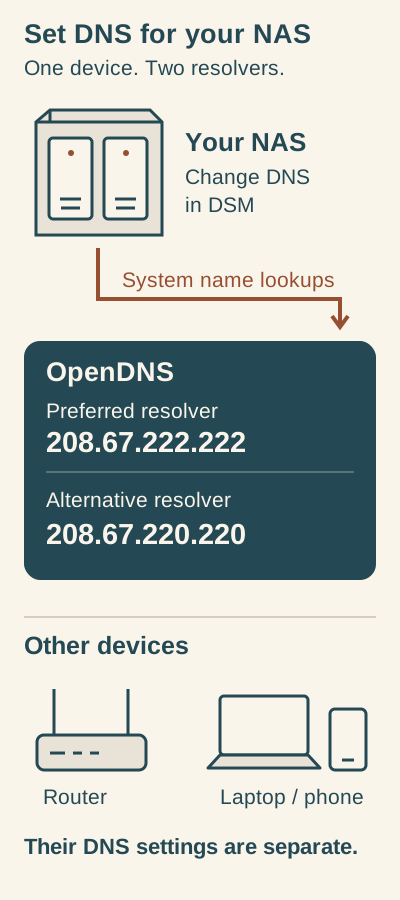
These addresses set the NAS DNS resolver. Other devices have separate DNS settings.
Change DNS in DSM for the NAS itself. Enter 208.67.222.222 as preferred and 208.67.220.220 as alternative. A laptop webpage does not check the NAS setting.
Before you change anything
Use an account that can change DSM network settings. Work from your home network and keep your existing DSM session open. Record the NAS's local IP address and your working local DSM URL, including its HTTPS scheme and port if shown. A port identifies a service at an address; preserve the one already in use. Keep normal certificate validation enabled. This task needs no new remote access or port forwarding.
In Control Panel > Network > General, save a private screenshot or note of whether Manually configure DNS server is checked and the current preferred and alternative values. You will need the original state if you undo the change.
If this NAS uses a workplace domain or depends on private names provided by your router or another local DNS server, ask the network administrator before replacing it with public DNS. OpenDNS cannot be assumed to know those private records.
Before editing DNS, refresh Package Center's package list and note whether it succeeds. Use this same action for the checks after the change and after undoing it. If it already fails, it cannot provide a useful before/after comparison. A successful refresh is a functional check, not proof of which resolver answered.
Enter the OpenDNS addresses
- Open Control Panel > Network > General in DSM.
- Select Manually configure DNS server.
- Enter 208.67.222.222 as the Preferred DNS server.
- Enter 208.67.220.220 as the Alternative DNS server.
- Check the numbers; do not add
https://or a port to either DNS field. Click Apply. Reopen the page and check that both values were saved.
Leave the NAS's local IP, gateway and other network settings as they were. The alternative address is another resolver, not a second NAS address.
Check the result from home
First confirm the two saved values. Then refresh Package Center's package list again and compare the result with your baseline from before the change. You do not need to install a package or apply a DSM update for this check. A successful refresh is a useful functional check; it does not identify the resolver used by every application.
The official OpenDNS setup guide links to welcome.opendns.com to check a configured device. If you visit it in your laptop browser, its result concerns that browser's DNS path. It does not verify the NAS simply because you also use that browser to administer DSM. Browser caching and secure DNS settings can affect that result.
This guide provides a documentation-based procedure, not a report of testing on a physical NAS.
If something does not work
The addresses did not save: Recheck the digits in General and confirm you clicked Apply. If your interface does not match these documented controls, use DSM's built-in help for your installed version instead of changing unrelated settings.
The NAS cannot refresh online information: Restore your previous DNS settings first. If that restores the same action, keep the previous configuration while you investigate resolver reachability with your network administrator or Synology Support. A failed refresh alone does not prove DNS is the cause.
Private network names stopped working: Return to your previous resolver. A public resolver is not a substitute for your local network's private naming service.
A computer still does not show OpenDNS: The NAS-only change does not configure that computer. Consult OpenDNS's separate device setup guide if your goal is to change another device or your router. Router and DHCP settings require a separate plan.
You expected all traffic to be filtered: These are IPv4 resolver entries, not an enforcement policy. IPv6 configuration, VPNs, containers and applications with their own DNS settings need separate review. Do not disable IPv6 or security tools to force a result. The standard addresses also differ from OpenDNS FamilyShield; parental-control configuration is outside this procedure.
Undo the DNS change
Return to Control Panel > Network > General. If manual DNS was previously enabled, restore the exact recorded preferred and alternative values. If it was previously unchecked, return the checkbox to that state. Click Apply, then refresh Package Center's package list again and compare it with your recorded baseline.
If a name-based DSM URL no longer opens, use your recorded local IP address and existing DSM port from the same home network. Preserve HTTPS and certificate validation; if a certificate warning appears, use an already trusted local access method or get Synology Support's help rather than bypassing it. Do not factory-reset the NAS or expose DSM to the internet to troubleshoot this change.