

Can’t find your Synology NAS after replacing the router?
Find your existing Synology NAS after a router change. Check the local network, use Synology discovery tools, and verify DSM and file access.
Eugene Gavrilov
7 min read- NAS & storage
Start by finding the NAS’s current local address. An old fixed address may no longer fit the network after a router change, so use local discovery before changing settings. The goal is to sign into your existing DSM and open a file you recognize.
This guide is for an already configured NAS. Check the local connection, use Synology’s discovery tools, and change network settings only if the result calls for it.
Record what stopped working
Before trying a fix, make a short record:
- The address you previously used.
- What happens when you open it.
- The NAS IP address, subnet mask and gateway, only if you already have those values. Do not guess missing settings.
Keep this record for diagnosis before changing anything. It does not guarantee that you can restore the old configuration if access is lost.
DSM is the operating system on your NAS, the device that stores your files. Its local IP address identifies it on your home network. The router connects networks; the NAS and router have different jobs. DHCP means the router assigns the address and network settings. An old fixed address may no longer fit after changing routers.
For the IPv4 settings discussed here, a subnet is a smaller network within a larger one. The subnet mask helps a device decide whether another IP address belongs to its local subnet. The default gateway is the router used to reach other networks—typically your home router. These terms explain the values you may already have recorded; you do not need to calculate or invent replacements.
Check the local connection
Check that the NAS has power and that its network cable connects to your home router or a switch connected to it. Put your computer on the intended home network. Synology’s discovery guidance requires the NAS and computer to be on the same local network and subnet. Connecting both to the intended router checks the physical path; it does not prove that their address settings match.
Start with that ordinary connection path before changing settings. If you do not know the NAS’s subnet, try discovery and record the result. An unresolved mismatch belongs in the diagnosis record; do not guess a replacement address.
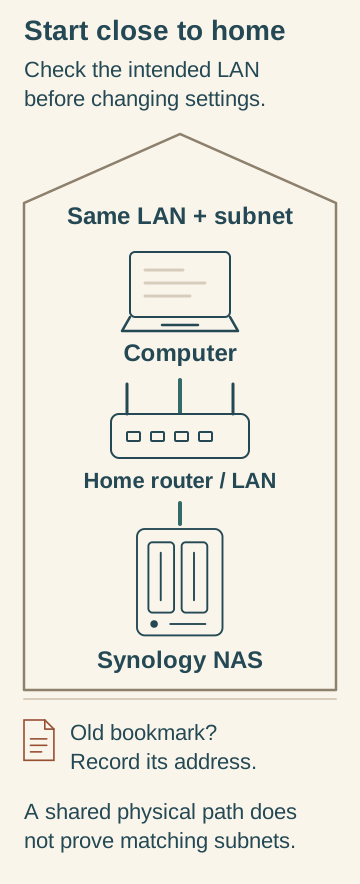
Text alternative: Check power and the NAS network cable. Confirm that the computer and NAS use the intended LAN and the same subnet. Record the old bookmark address before changing settings; a shared physical path does not establish matching address settings.
Find the NAS with a discovery tool
Synology provides browser-based Web Assistant and the desktop Synology Assistant for local discovery. The address https://finds.synology.com opens Synology’s Web Assistant discovery portal. It helps locate your NAS; it is different from the NAS’s own local IP address, which the discovery tools report.
If your NAS has no Internet access, use desktop Synology Assistant instead. You will need Internet access to obtain its installer if it is not already installed.
- Open Synology Web Assistant in your browser while your computer and NAS are on the same local network and subnet.
- If it lists the NAS, check the model and other identifying details before opening it. If it finds nothing, try another browser, then move to Synology Assistant.
- In Synology Download Center, select your NAS model and look under Desktop Utilities for Synology Assistant. Check that the offered installer supports your computer’s operating system.
- Open Assistant and click Search to refresh the device list. Record the IP address, model and status shown for your NAS. Select the NAS and click Connect to open it.
The current Assistant specification lists Windows 10 or later, macOS 12.4 or later, and Ubuntu 20.04 or later. Check the download offered for your operating system before installing.
Discovery results and the next check
| What you observe | Next check |
|---|---|
| Web Assistant finds nothing | Check the shared local network and Internet connection. Try another browser; use desktop Assistant if the NAS is offline or browser discovery still fails. |
| Desktop Assistant also finds nothing | Record the empty search result and the power/cable checks. Stop changing settings and seek support with this record. |
| Assistant reports Connection failed | Review the conditional network recovery below. The status indicates a network configuration error. |
| Assistant reports Ready | Select it and click Connect. If DSM does not open, record the address and browser error for diagnosis. |
| DSM opens but sign-in fails | Record the sign-in error and seek help with that failure. Stop the network-repair path here. |
| Sign-in works but the known file does not open | Record the file-access error and seek help with that failure. Stop the network-repair path here. |
| An existing NAS unexpectedly reports Not installed | Stop the installation route and seek diagnosis; do not proceed with installation over the existing system. |
Repair a confirmed network configuration problem
Use this section if Assistant reports Connection failed, particularly after a router change. Assistant’s Setup action configures network settings. Before using it, record the previous IP address, mask and gateway wherever those values are available. Once DSM opens, stop this network-repair path; a sign-in or file-access failure needs its own diagnosis.
The following DHCP wizard sequence is supported by Marius Hosting’s guide updated on August 18, 2022. Its exact wording has not been independently observed in the current Assistant version, so use it only when the available controls match the described action.
- Select the affected NAS in Assistant and open Setup.
- Sign in with an administrator account when the wizard requests credentials.
- Select Get network configuration automatically (DHCP) and finish the wizard. This asks the router to allocate suitable network settings.
- Search again. When the NAS reports Ready, select it and click Connect.
If this change makes access worse, search again in Assistant and record what it shows, including an empty result. Stop making changes and keep the old settings and new observations for Synology support. Saved values alone do not provide a working rollback route. Do not reset or reinstall as the next step.
Verify access, then keep the working address
Sign into your existing DSM and open a file you recognize in a shared folder. Save the working address alongside your NAS network-setting record.
If DSM already opens through another route but Web Assistant does not find it, check Control Panel → Info Center → Device Analytics → Share Network Location. This check applies when you already have DSM access.
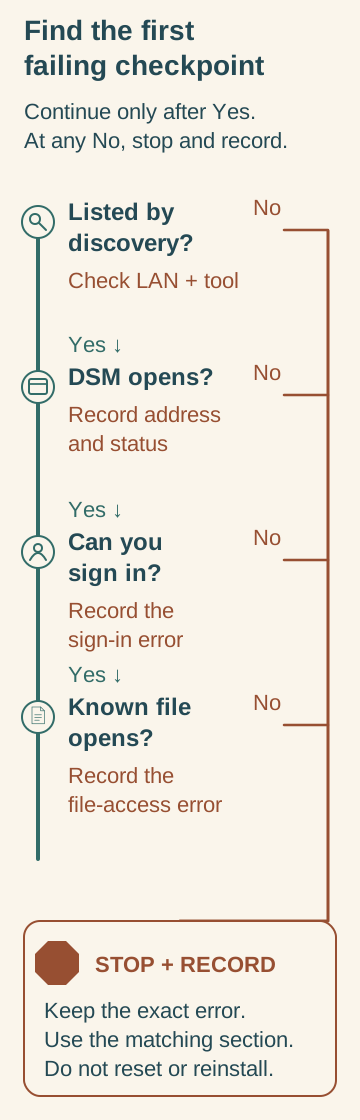
Text alternative: Check whether a discovery tool lists the NAS, DSM opens, you can sign in, and a known shared-folder file opens, in that order. Advance after Yes. At the first No, record the address, status or exact error and use the corresponding section of this guide. Once DSM opens, stop network repairs; sign-in and file-access failures need their own diagnosis. Do not reset or reinstall.
If you cannot complete the checks, keep a short record for diagnosis: the IP, model and status Assistant shows, the previous settings you recorded, and the first access check that failed. An unexpected Not installed status on a NAS with existing data is a reason to stop and seek Synology support diagnostics.
Sources: Synology discovery guidance and Assistant help. The conditional DHCP wizard above follows Marius Hosting’s guide dated August 18, 2022; its exact current labels were not independently observed. No physical NAS test is reported here.